Showing posts with label Crafts. Show all posts

Sunday, January 15, 2012

Pinterest Addiction part II

Hello All, Ashley here!  Sorry I have been on a blog hiatus this week, its been a long and busy one.  This week we celebrated Matt's birthday, so a quick Happy Birthday to him. 

                               First Up:  Our completed Color Me Mine pieces found in our post here.


Next Up:  Ashley's Pinterest Addiction! While not easy to pick a board to highlight,  I have chosen to highlight pins off of my "DIY Projects and Crafts" board.

First up:  Our Pantry Door
[Mall_madness_and_Kitchen_Pantry_vinyl_039[1].JPG]
Original Project is found here .    Since our kitchen is connected to the dining and living room area I have always wanted to isolate the kitchen as its own room by giving my kitchen it's own decorative theme.  So, I've added this vinyl decoration onto my "to-do" list, but I'd love to make it on my Cricut!

Project #2 -  A DIY  bench, find the tutorial here.  It's actually a redone COFFEE TABLE!  How fun.  Once this project is completed I'd place the final product between the two tall windows in my master bedroom.


And finally something I have to complete to get a start on my to do list.
When it comes to security in my home I would like all of the bells and whistles that I can get, but that doesn't come over night, therefore near the top of the to-do list is frosting the glass next to my front door to add a touch more privacy to our entry. 

Pinned Image
This project was found on this blog and also here on Young House Love


Sunday, January 8, 2012

Color Me Mine

For my bachelorette party , Amy had the idea of going to a place called Color Me Mine  Where you can choose a piece of pottery and paint it how you wish.  After about a week you pick up your finished piece.  Amy and I had hoped to make it to Color Me Mine to pick and paint something for our mom for a Christmas gift.  We didn't make it to paint something for her so we decided to let her choose for herself and we made a mother/daughter day out of it. 

This is my bowl when in progress.

Amy chose to make a large mug as a memoir of her first half marathon.  She also painted the mileage on the mug.

Our Mom chose a mug as well but hers was more for fun rather than to remember something special to her. 


Complete! 

We've agreed that Color Me Mine is a fun place to go on a rainy (or snowy) day.  Whether you have a vision of the product you want to accomplish at the end or not its a good way to use your creative side!

Wednesday, December 28, 2011

Sisters: Blue, well, Black, Ribbon

Since I had several days off before Christmas this year, I felt the need to get crafty on some of my gifts.  So, I decided to make some jewelry (something I really like to do, but don't often enough, for whatever reason).  I love the look of those ribbon necklaces, so I made three complementary necklaces, one for Ashley, Mom, and myself.

I got a great deal on some beads, chain, and ribbon at Michaels, and I had some jewelry wire in my craft box, which really came in handy.
Heaven forbid I walk downstairs where I could actually have some room on the table

To start, I basically just looked around at some pictures of ribbon necklaces online, and got started.  It was not easy taking pictures during the process.

For Ashley's, I attached some wire to the chain and beaded silver beads onto it to give it a doubled-up look.  The back was a ribbon with a bow at the end.

Ashley's finished product
For my necklace, I beaded alternating "pearls" and silver beads onto the wire, then used a ribbon for the back.  Instead of a bow, I attached the flower I wore in my hair for Ashley's wedding.  I've been wanting to find a way to use it, as I rarely wear barrettes, and I ended up loving this!

My finished product
Finally, I wanted to make mom's a little different, so I took parts of mine and Ashley's, and then added a little something new.  So, the beading part was the same as mine.  Then, I used chain for the back but weaved (wove? hm...) ribbon through it.

Mom's finished product
Honestly, I feel like my mom's necklace needs something more; I just can't figure out what it is.  She says she's happy with it this way...but you know moms have to say that.  :)  I'm waiting for the genius solution to come to me.

Have you ever made jewelry before?  How did it go?


Tuesday, December 20, 2011

Stuff: Master-ed

2011 has been a HUGE year for me.  I feel like I have had a significant event every month of the year...so, to top it all off, I ended 2011 by getting my masters degree!

I have been working toward it for two years, and our final project involved all of our classes put together.  So, I, of course, decided to get crafty.

Most people in my class did a creative project, so mine was a Christmas tree.  Each ornament on the tree represented something I learned in the program (they are printed on the back...I just didn't take a picture because that part wasn't as pretty).  I simply printed some coloring pages, laminated them, and decorated them with glitter glue.  (As you can tell, particularly from the Christmas tree and snowman, I am quite the artist...haha).

Pay no attention to the giant powdered sugar bag...it was not part of the project.  :)
I made a LOT of ornaments!  Unfortunately, I forgot to take a picture of the finished product on my cute mini-tree from high school!

After our final class, my classmates and I went out to Chili's and had our ugly ornament exchange.  Mine was definitely a doosy!

I decided not to walk at graduation (spending multiple hours listening to a list of names was not something I wanted to do, again).  So, my family and I went out for a nice dinner to celebrate.

Thanks to my family...and yay for having my Wednesday nights back!

Anyone out there taking classes?  I'd love to hear about them...I'm a bit of a school-o-holic!

Sunday, December 11, 2011

Sisters: Crafts!

A friend of Amy's and mine suggested the idea of a "craft club"--at least that is what we call it.  You take the idea of a book club and tweak it to make it into a craft club.  Tonight, we got a small group got together to make the same craft.  Since it was our friends idea she picked the craft, she picked jute wreaths.  They were time-consuming, but the final product looks fantastic!!  We used cardboard letters that matched the first letter of our last names, and hot glue guns and felt squares to make the rosettes.  You can use ribbon to create a bow as seen in the tutorial or you can opt to not add a bow.   I used ribbon to create a hanging loop.  Some of the other ladies made a bow that is shown in the final product of the tutorial.  All in all, we agreed it was fun!
Here is my letter prior to adding the rosettes.

And it's complete!  I plan to hang it in my newly-painted powder room and will post a picture of it hung up as soon as it's on the wall.

Amy's work-in-progress

Drumroll please...


The finished product!


The colors went perfectly with Amy's bedrom color scheme, and she's been wanting something above the bed...so this is it!  Now, she just needs a headboard!

Tuesday, November 29, 2011

Sisters: Crafting Fun!

Now seems like a great time to recap our crafting projects from Sunday.  Amy realized that because she is in her own house she needs more holiday decorations, therefore she set up the day with the creative name "Christmas Craft-stravaganza."  We decided that about 3 projects would be a fair amount to start with, and our mom joined in as well.  We got most of our ideas from Pinterest.

I'd make a liar out of myself to say everything was flawless,  because we did have quite a few issues-- spray paint running off of a glass bottle to the primer that stuck to the bottle running out completely, paint everywhere, things knocked on the floor.  We gave up on a few ideas, but, regardless, we hope to make it an annual tradition.  Here is what we came up with!

This is my shadow box.  I bought the shadow box and fillers at Hobby Lobby and used my cricut machine to make the letters.

Amy had some trouble painting her bottles to create her first project so she chose to move to her next project-- a clay pot Christmas tree.  It took some time for the paint to dry; this is the "in progress" photo.

Amy also created memory ornaments!  She put some white paint into a glass ball ornament and used a silver Sharpie to write memories from the year.  She had quite the year this year, and that was a great idea for a memoir!


I created a set of coasters using the base of a clay pot and an etched mirror.  I also created a photo frame on a candle stick, now just to find the perfect picture to put in it!

Amy and I agree this project of my mom's was a great idea!  She's going to use it as a cupcake stand.

When I got home, I decided to create a last-minute project that I didn't originally plan to make.  I printed out one of my favorite photos on a piece of vellum paper and used Mod-Podge to paste it on a glass candle holder.  It is one of my favorite decorations in my house right now!

_______________________________________________________________________________
Today I am thankful for the giggle of a child.  That particular sound made my day great and made it fly by.

Amy's turn!  Today I'm thankful for baking.  I find it so therapeutic, and it's great having snacks to show for it!  :)

Tuesday, November 22, 2011

Spaces: Upcoming Craft-stravaganza!

Amy and I have put together the idea of our first annual Christmas Craft-Stravaganza.  Both being in new houses this year we are in need of some things to decorate our houses with and what better things to decorate with than things we have hand made ourselves!!  So we've taken some ideas from Pinterest and are going to put them into action this upcoming weekend. 

Here is a preview of what I plan to make!


Photo frames on candle sticks.


   and wooden hearts painted with chalkboard paint for ornaments and gift tags!

I (Amy), have some projects up my sleeve as well:

I'm really excited to get to develop my own Christmas decorating "theme," and I want to go with a silver/white sort of thing.  I'll have other things mixed in, of course, but I just think the silver and white is so pretty!  This project is from bhg.com, but the link I click on Pinterest gives me an error.  Looks like I'm coming up with this tutorial on my own!

Ashley and I have been saving up wine bottles for months, so I think this project project will be a great use for them.  Now just to find some elegant things to put in them!

This is my first time having my own Christmas tree, so I will be making LOTS of ornaments to decorate it.  This idea (from mommysavers.com...Pinterest link is broken) is one of my absolute favorites...you write memories from  the year on it.  I think this will be a great tradition, and I'm picking an amazing year to start it!  I'm thinking a white ornament with silver Sharpie?

We can't wait for the Craft-stravaganza!  It's gonna be epic!

___________________________________________________
On to being thankful!  Ashley first...

Today I am thankful for feeling appreciated.  I started my day today with a message from my boss saying how much i'm appreciated for the hard work I do every day and it put me in the best mood.

And now Amy...

I am thankful for to-do lists!  Even if there is a lot on it, somehow having it on a list makes me less stressed.

Thursday, November 17, 2011

Spaces: "L" Marks the Spot

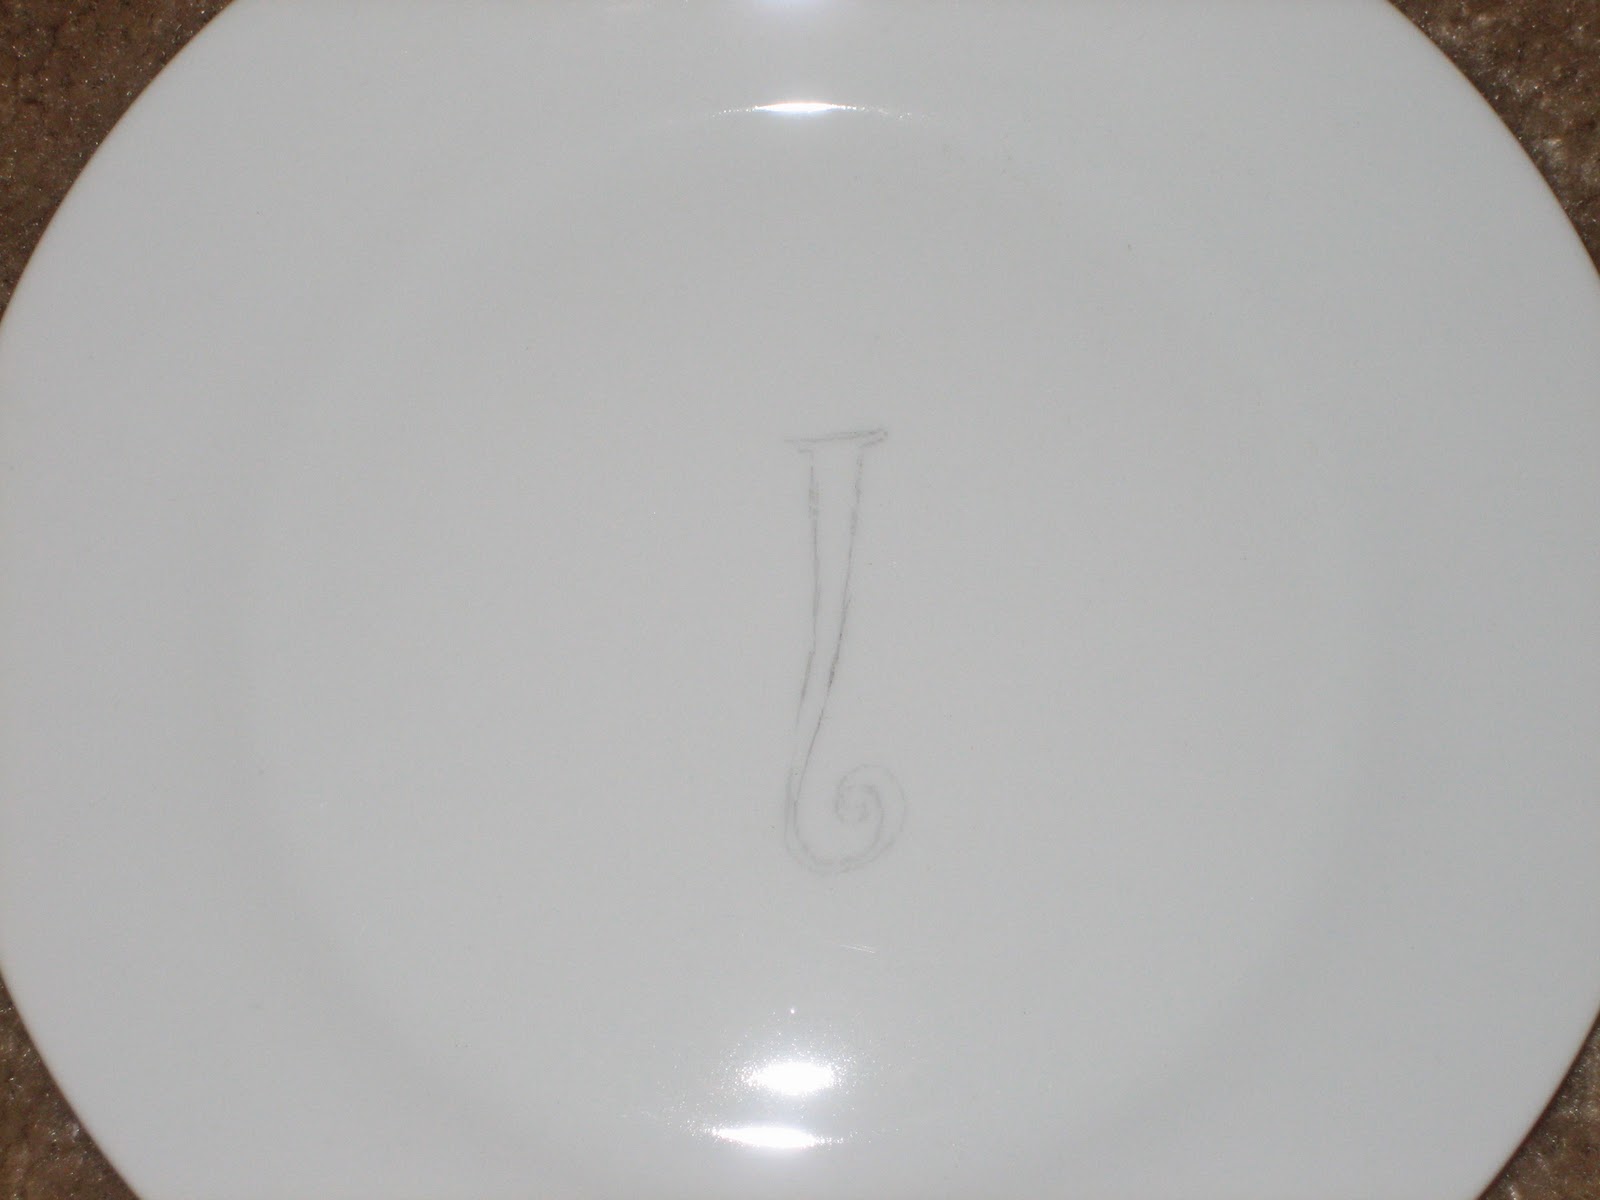
If you know me, it's no surprise that I wanted to make something for my sister and new brother-in-law's wedding gift.  I had been eyeing this tutorial from Lemon Tree Creations for quite some time now.  My sister loves personalized stuff, so I decided now was the time to make them!

All I really needed for this project was some plates and a porcelain pen.  The hardest part was the plates, as I was kind of picky and wanted a set on a stand, and the only one I could find was at World Market, only in stores (not that I have a problem going to the store because I LOVE it...but let's say I may have procrastinated a little and wasn't happy about the 40 minute drive to get there).

Once I got the plates, I started off my finding "l's" in fonts that I liked.  I got a set of 10 plates, so I made 5 matching sets.  I scribbled all over the back in pencil, then went over the outline in pen to transfer the pencil onto the plate.

Then, I colored in the outline with my porcelain pen.

After finishing all the plates, I let them dry for about a day, then baked them according to the instructions on the porcelain pen.
I was really pleased with the way they turned out...and I hope the newlyweds are too!
_________________________________________________________________

Today, I'm thankful for coffee!  Although I may hold the record for the fastest development of an addiction, that stuff is just. so. good!


Ashley's Turn!
  Perfectly fitting along with the theme of the blog above.  Today I am thankful for my hubby Matt!  Today marks 2 months since our wedding day.  And we use the plates shown above with our dinner tonight!  We love them.

Thursday, September 1, 2011

Summer Recap

Well...it's September 1st.  Although lots of good things come in September, the big bummer about it is that summer is pretty much over.  So, before I get too sad about the end of the best season of the year, I'm going to highlight some awesome things that happened this summer!

1. Summer started with a fantastic sister-date to a comedy club.


2. I bowled it up with some friends...although I could never get a strike when I needed it!


3. I had a great time at my cousin's wedding.


4. We celebrated for Ashley's bridal shower.


5. I did all kinds of fun crafts (like this one) with one of my favorite people on Earth.


6. I met one of my running goals--a 5K with no walking!  (Not sure if I'm ready for the world to see the hot mess I was after this one...so no picture for now, haha)  And...decided to make my next goal a half marathon.

7. I played some softball, got quite dirty, and laughed...a lot!  First place season!


8. We did a whole bunch of cooking (New Recipe Night rocks!)...and sometimes the failures were the most fun!

9. We celebrated some more wedding stuff with Ashley's bachelorette party.

Wow...that was a busy three months!  Now, the final weekend of summer is upon us.  Make it a great one!  I know I will...

Sunday, August 28, 2011

They're Fired!

I picked up the finished and fired pottery pieces from last weekend's bachelorette party.


Didn't they turn out great?  I made the soap dispenser near the center, and Ashley made the goblet on the right side.  All of us girls signed the tray in the front as a gift to the beautiful bachelorette.  My personal favorite is probably the spoon rest...or the dog dish...or the pumpkin...I just can't decide!

Have a great week!

Amy

Saturday, August 27, 2011

Bachelorette Party- DIY Style

Sorry we've been MIA again...the start of a new school year and Ashley's wedding festivities kicking up have us oh.ver.whelmed.

Last weekend was Ashley's much anticipated bachlorette party!


I decided that I wanted to be sure to make some things for her myself, since I wanted it to be special.  So, toward the beginning of the summer, I found an awesome idea for a photo tray at I DO Invitations by Michelle.  (I am having a terrible time finding the exact picture, but I will update when I find it.  She does some amazing stuff, so a little time browsing her blog will not be time wasted. :) )

So, I decided to whip up a tray for Ashley as a momento of the girls that were at the first phase of the party.


It was SUPER simple!  I just picked up the tray at Target, printed out some photos, cut them down, and Mod Podge-d them on.

I also decided to make the invitations myself, which I think was my favorite project of all the ones I have on here today.


I also decided to customize one of those adorable Bride/Bachelorette glasses that you can buy at party stores.

I forgot to take a picture after it dried...so this one is close.  I just used scrapbooking stickers to spell out "Bride" on the base and covered it with a coat of Mod Podge to keep them from peeling off.  For the "veil," I just used a piece of tulle, tied a ribbon around it, and glued the ribbon to the glass.  Again, super easy!

Aside from the DIY goodies for the bride, a large portion of the party was DIY, as we went to a paint-your-own-pottery place.


We reserved the party room, so we could be together as a group without disturbing others...haha.  We got to bring food and drinks, and it was a great time!  Ashley painted a glass to use at her wedding, and I made a soap dispenser for my kitchen.  Mine didn't quite go according to plan, so I'm looking forward to seeing the final product(s) when I pick them up this weekend.

Overall, we had a great time painting the town...and the pottery!

Amy